frp 部署流程
一、frp下载及配置
1、 下载地址
### 下载地址 ###
https://github.com/fatedier/frp/releases # 需要梯子,国内镜像似乎没有frp
# 找到最新的包下载(注意架构,如:frp_0.51.3_linux_amd64.tar.gz)
2、服务端配置
- 配置文件配置
### 解压frp.tar.gz ###
tar -zxvf frp_0.51.0_linux_amd64.tar.gz
cd frp_0.51.0_linux_amd64

### 修改服务端配置 frps.ini (注意去掉注释) ###
[common]
bind_port = 7000 # 主端口,服务端与客户端保持一致
token = "yourtoken" # 服务端与客户端保持一致
dashboard_port = 7500 # 看板端口
dashboard_user = "admin" # 用户名
dashboard_pwd = "123456" # 密码
vhost_http_port = 80 # http代理的虚拟主机端口
vhost_https_port = 443 # https代理的虚拟主机端口
log_level = info  # log级别 debug、trace等
log_file = ./frps.log # log文件
log_max_days = 7 # 日志保持时间 7 天
- 测试
### 测试命令 ###
./frps -c ./frps.ini
- 自启动配置
### 创建服务文件 ###
sudo vim /etc/systemd/system/frps.service

### 写入服务配置 ###
[Unit]
Description=FRP Server Service
After=network.target

[Service]
Type=simple
# 替换为你的 frps 实际路径和配置文件路径(绝对路径)
ExecStart=/usr/local/frp/frps -c /usr/local/frp/frps.toml
Restart=always  # 进程退出时自动重启
RestartSec=5    # 重启间隔(秒)
User=root       # 推荐用 root 运行(避免端口权限问题)

[Install]
WantedBy=multi-user.target

### 启动并设置开机自启(注意切换root用户)###
# 重新加载服务配置
sudo systemctl daemon-reload

# 启动 frps
sudo systemctl start frps

# 设置开机自启
sudo systemctl enable frps

# 查看状态
sudo systemctl status frps

### 常用命令 ###
# 停止服务
sudo systemctl stop frps

# 重启服务
sudo systemctl restart frps

# 查看日志
sudo journalctl -u frps -f
3、客户端配置
- 配置文件配置
### 在内网环境解压包(注意系统与架构) ###
### 此处为macos ###
tar -zxvf frp_0.51.3_darwin_arm64.tar.gz
cd frp_0.51.3_darwin_arm64

### 修改客户端配置 frpc.ini (注意去掉注释)###
[common]
server_addr = 1.2.3.4 # 公网ip或域名
server_port = 7000 # 端口,与frps保持一致
token = "yourtoken" # token,与frps保持一致
log_level = info  # log级别 debug、trace等
log_file = ./frps.log # log文件
log_max_days = 7 # 日志保持时间 7 天

[ssh]
type = tcp # tcp代理
local_ip = 127.0.0.1
local_port = 22  # 内网环境端口
remote_port = 2222 # 代理端口

[web_server]
type = http # http代理
local_ip = 127.0.0.1
local_port = 80    # 内网环境端口
remote_port = 8080 # 代理端口
custom_domains = example.com # 域名

[web_server_443]
type = https # https 代理
local_ip = 127.0.0.1
local_port = 443 # 内网环境端口
remote_port = 4430 # 代理端口
custom_domains = example.com # 域名
- 测试
### 测试命令 ###
./frpc -c ./frpc.ini

### tcpdump 抓包 debug ###
sudo tcpdump -i en0
- 自启动配置
### 编辑配置文件(文件名建议用反向域名格式,如 com.example.frpc.plist) ###
vim ~/Library/LaunchAgents/com.example.frpc.plist
- 写入配置
    Label
    com.example.frpc

    ProgramArguments


        /Users/你的用户名/frp/frpc
        -c
        /Users/你的用户名/frp/frpc.toml


    RunAtLoad


    KeepAlive


    StandardOutPath
    /Users/你的用户名/frp/frpc.log

    StandardErrorPath
    /Users/你的用户名/frp/frpc.error.log
- 添加自启动
### 启动服务 ###
launchctl start com.example.frpc


### 验证是否运行 ###
# 查看进程
ps -ef | grep frpc | grep -v grep
# 查看日志
tail -f /Users/你的用户名/frp/frpc.log

### 常用命令 ###
# 停止服务
launchctl stop com.example.frpc
# 卸载服务(取消自启)
launchctl unload ~/Library/LaunchAgents/com.example.frpc.plist
# 修改配置后需重新加载
launchctl unload ~/Library/LaunchAgents/com.example.frpc.plist
launchctl load ~/Library/LaunchAgents/com.example.frpc.plist
二、看板及注意事项
1、 看板
使用ip:7500即可查看看板:

2、注意事项
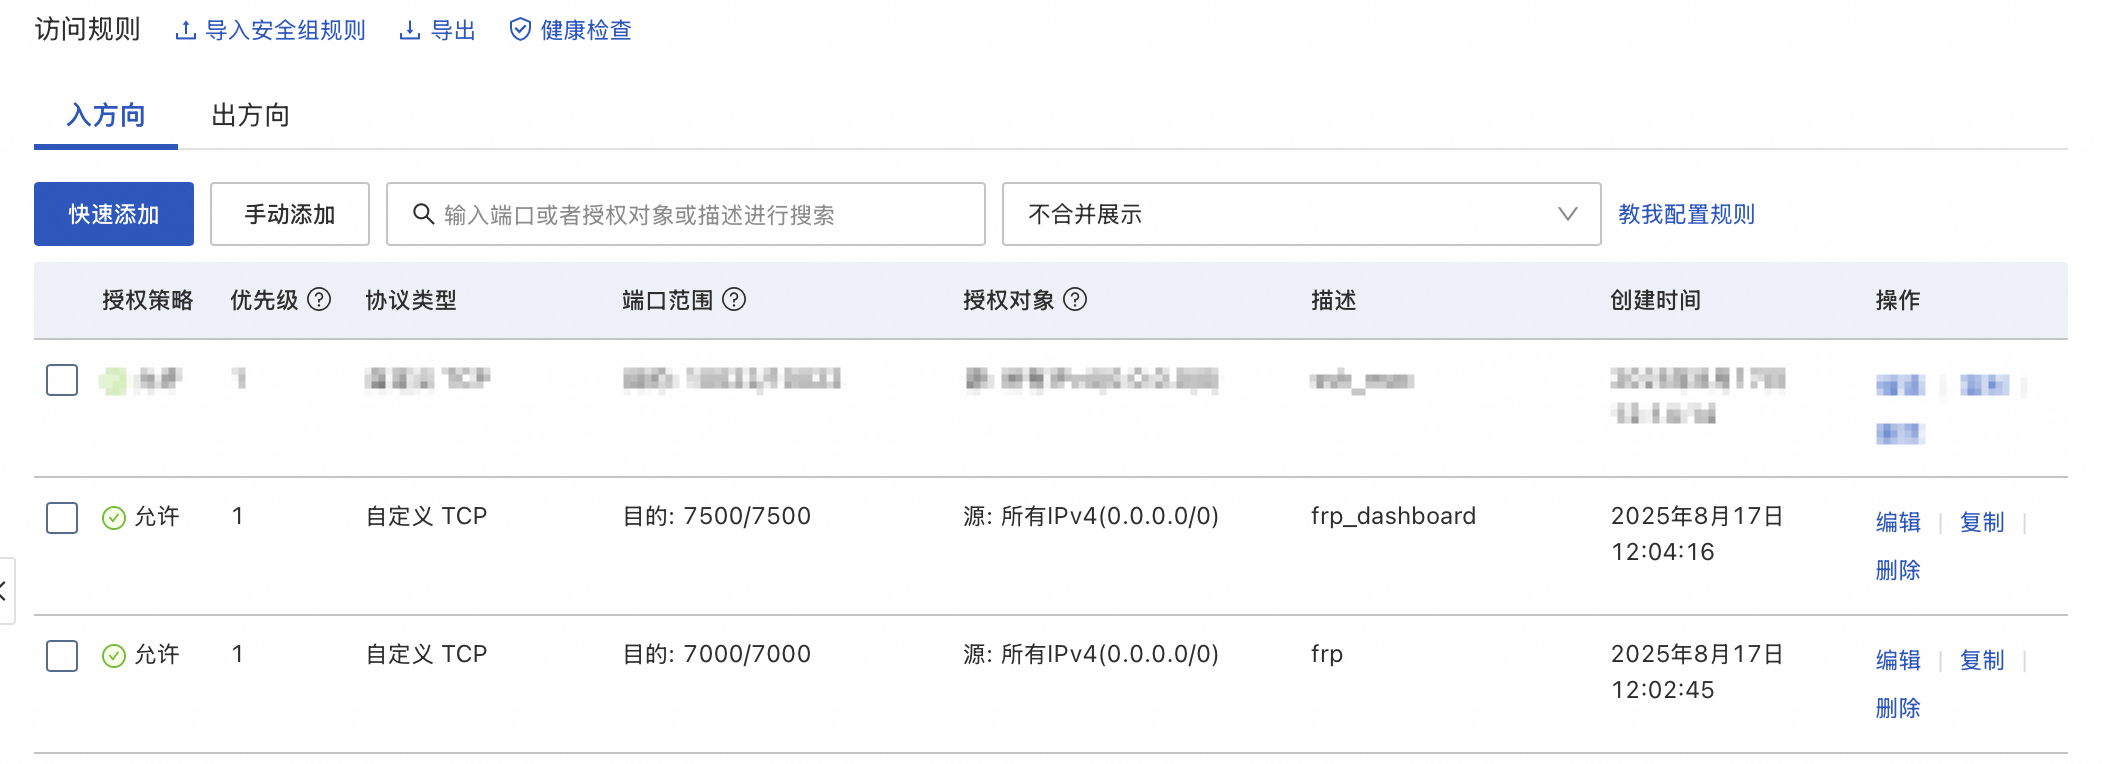
注意放开云服务器中的的安全组: